
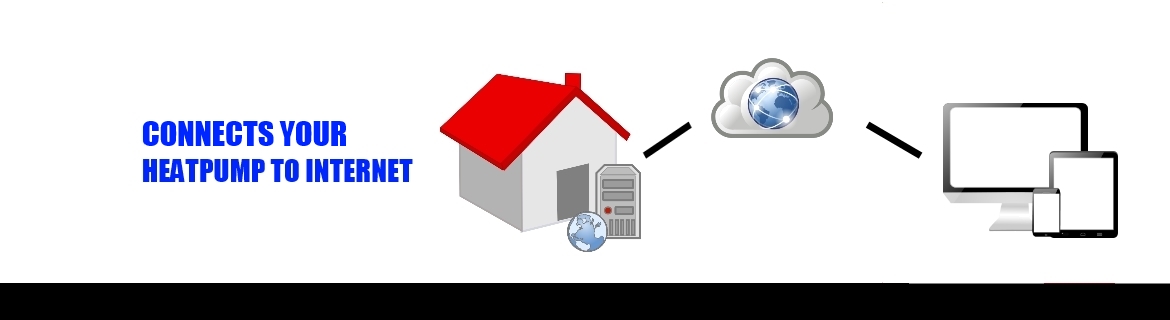


Installing ThermIQ-USB
You will find a complete installation description here . It will also guide you through the SW installtion. Below is short summary:
First step to install ThermIQ in your heatpump is to turn off the main switch and open the front to locate the main control-board. The main control-board is located on the front behind a black plastic cover. On the top left side of the board you will find a connector labeled EXT to which you should connect the ThermIQ. The connector is polarized and can not be reversed. The cable is then connected to one any one of the two identical connectors on the ThermIQ. If you already have another expansion board connected to the EXT-port then you should first disconnect it and connect it to the similar port on the ThermIQ-interface before connecting the ThermIQ-interface to the EXT-port. The ThermIQ-interface should then be attached with the supplied Velcro to the plastic cover in a way so that both the USB connector and the SD-Card is easily reached. Attach an USB cable and bring it outside of the heatpump. Put on front cover and turn on the main switch. If you have a Thermia produced after 2008-03-01 then it will now automatically recognize the ThermIQ-interface and no further installation is needed. Older Thermias If your heatpump is older, probably with a greenish display, then you have to change some settings in the Installation menu in order to get the heatpump to recognize the ThermIQ-interface. Changing settings on Thermias older than 2008-03-01 ======================================== 1. Push both left and right arrow for 5 sec until display says “Service” 2. Push down-arrow until “Installation” then push right-arrow. 3. Push down-arrow until “Node”. Change the value to 2 or more, if the value already is 2 then keep it like that. 4. Turn off the heatpump and start it again. 5. Your ThermIQ-interface is ready to use.  Installed and ready to go in a Thermia Optimum G2!

